Architectural designs for office spaces are unique and require accurate visualization to help clients assess the merit of their proposed area. As architects and interior designers, it is easy to understand how they are structurally different from residential or hospitality projects. However, to pitch convincingly to clients, it is essential to use visual tools to showcase designers’ ideas in their entirety.
3D renderings can help easily show your office layout, and interior design and help viewers see the intricacies of the project. The photorealistic images developed as part of the 3D visualization project help you and your client understand what the interiors would look like once constructed and occupied. This brings about clarity in communication, changes in the design, if any, and client satisfaction.
So, if you’re interested in learning more about how CGI visualizations for interior office projects come to life, read on until the end.
Phase 1: The Architectural 3D modelling and the development of the base White Clay Renderings;
Table of Contents
As a pre-requisite to begin developing the renderings, the 3D artists start by diving deep into the client’s vision. Our team needs to receive an in-depth understanding of the project. It requires acquiring all assets available to the client, like interior layouts, sketches, and concept reference images at the design stage.
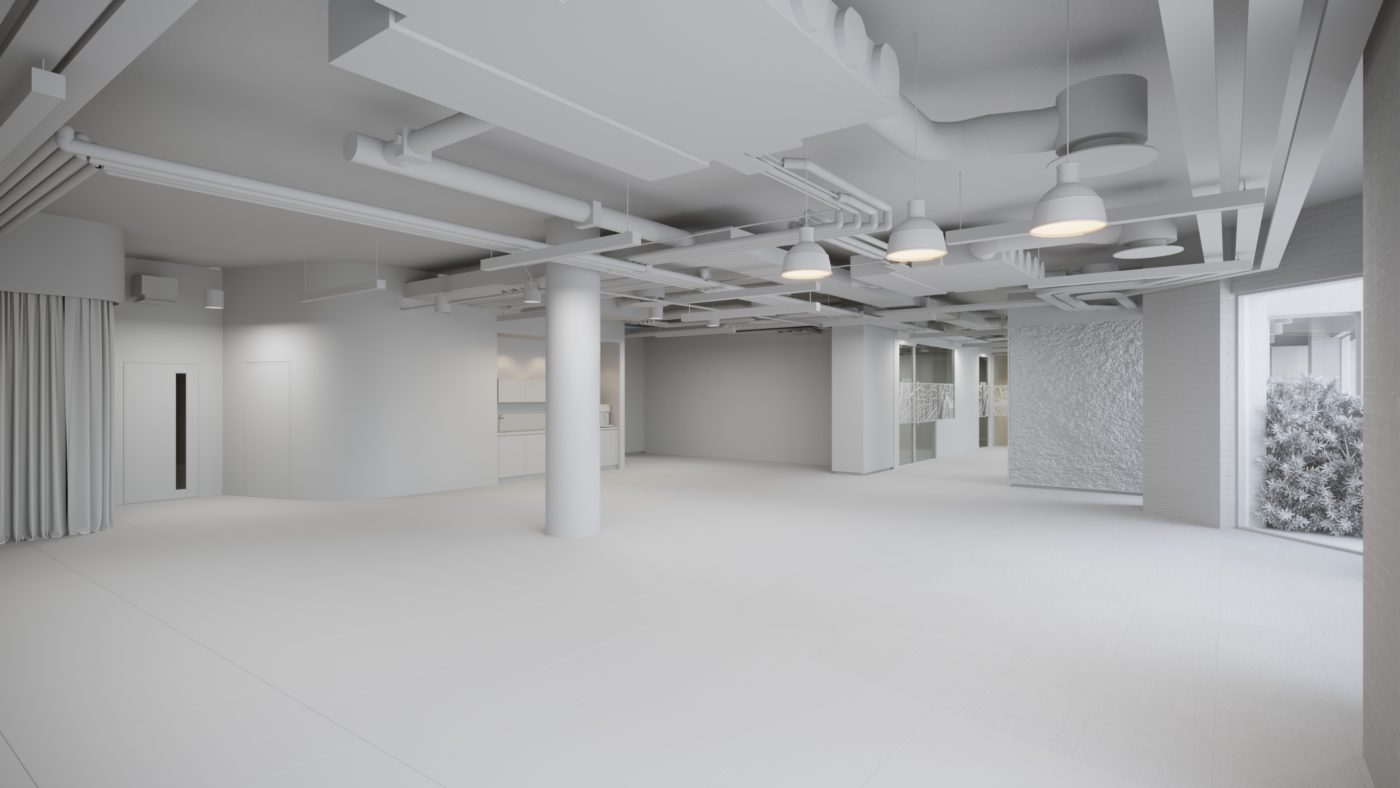
Once the reference data and the brief on the mood, general lighting and surroundings are received, our 3D modelling team creates the base 3D architecture base model. At the end of this stage, they are also referred to as white clay renderings and can be thought of as simply creating the 3D structures of the interiors in the image. It helps understand the interiors’ volumes and overall geometry without the furniture and movable fixtures.
White clay rendering is just as it sounds – it doesn’t include any colour or materials and may not use any environmental lighting. The aim is to show the client a series of camera angle options, layout and overall flow of the digital visualization.
Phase 2: Incorporate into the space the FF&E;
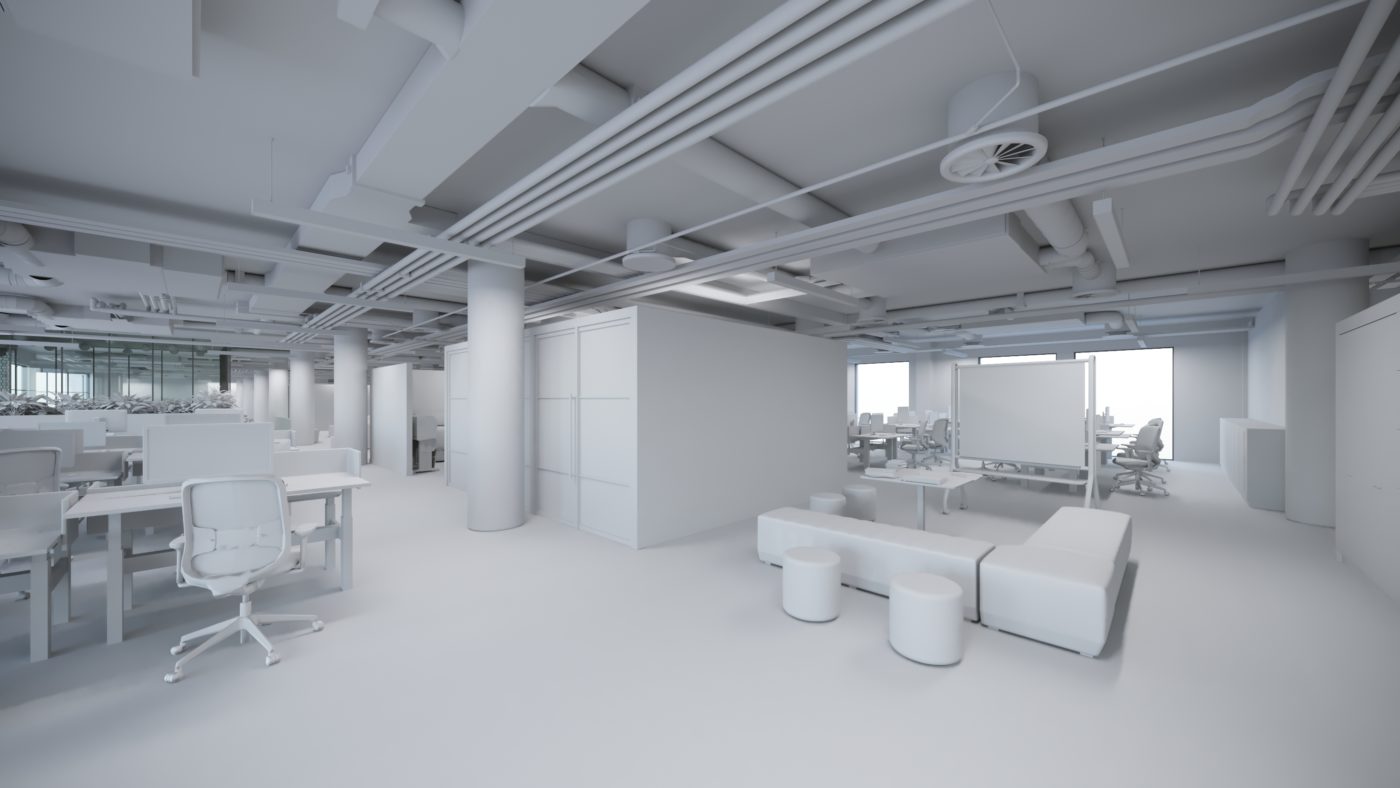
The second step of creating the CGI model for the office design interior is adding the appropriate furniture, fixtures, and equipment according to the interior design package that was received from the design team.
In office space renderings, this includes adding custom or loose furniture pieces, utility items, decorative lighting and appliances. It helps clients understand the geometries and volumes of the space and what the room would look like with all design elements placed into the 3D model. Colours and textures are not added at this stage. A round of revisions is also done with the client and the 3D artist team to reach satisfactory structural soundness before proceeding to the next step.
Phase 3: First Draft rendering stage – Adding texture and materials
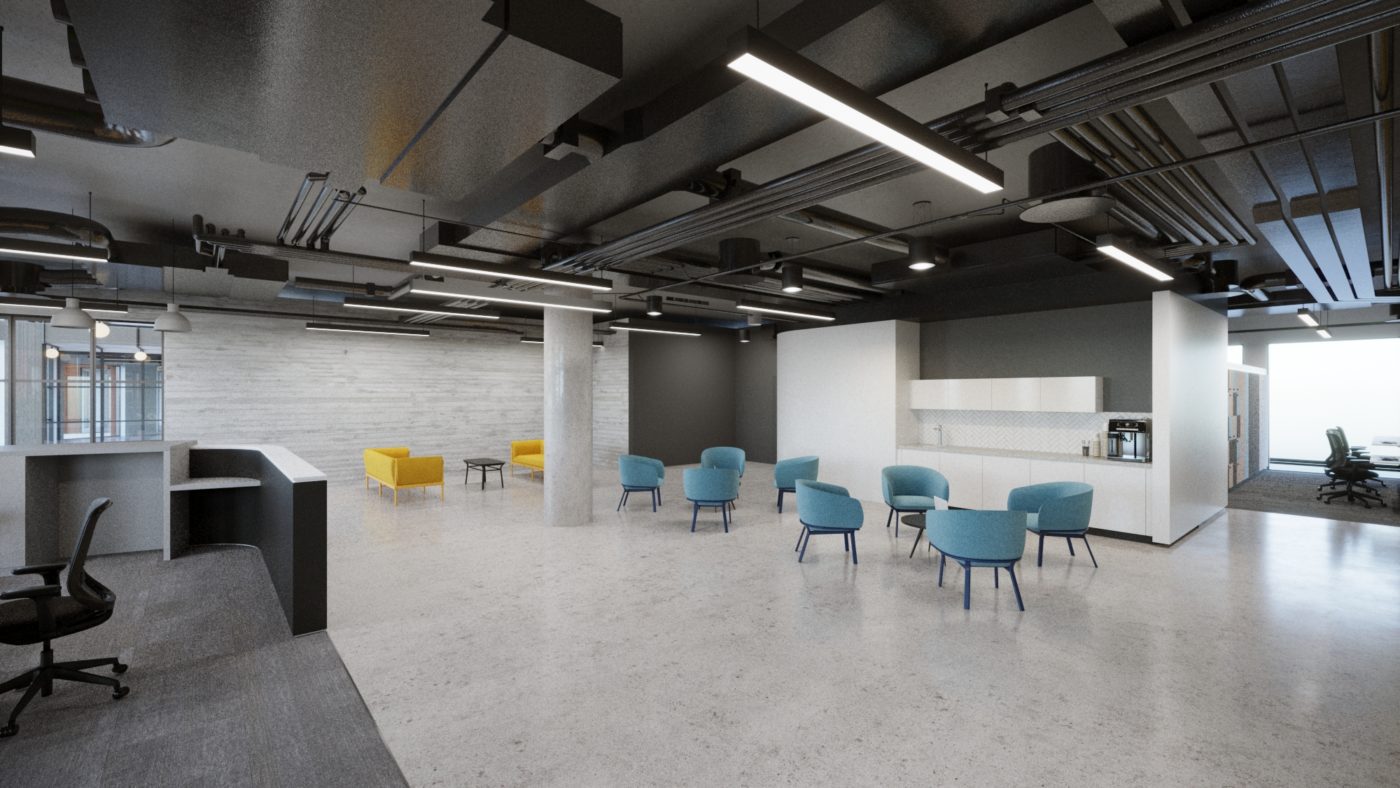
Once the 3D model is structurally sound, we add the materials and textures to make it more life-like. This step is essential to help clients understand the look and feel of the space fully texturized.
The lighting, materials, and other elements are added to the image according to the materials schedule, and FF&E package received from the client. At this stage, the 3D artist team provides the first set of fully rendered images for the client’s review in a draft renderings resolution. We expect to receive the first series of red-marked revisions based on the client’s feedback and work further on it.
The visuals of the lighting and materials give life to the renderings. Expertise and experience in developing 3D renderings bring about an eye for detail and an understanding of the typical geometry in the white clay model, on top of which the textures are added. The intensity and direction of light, the smoothness of the surface textures, and other such aspects must be done to perfect detailing to bring about realistic images. The décor and lifestyle details in the office interior 3D rendering reflect the client’s and organization’s specific requirements. If the client shares information on the requisite trends, these instructions are strictly followed to comply with the requirements.
Phase 4: Processing clients’ comments – revision stages
We believe that rendering is a highly creative process that works best when both parties collaborate and communicate. To facilitate a regular exchange of feedback, the architectural rendering team and the client are in constant touch via video calls, emails, or any other method that works for both. We have been offering for a few years the possibility to have quick interactions between our project managers and the client technical or marketing team using WhatsApp groups and have weekly or daily conference calls with screen sharing. These tools are tremendously helpful in speeding up the execution of project milestones.
As the 3D renderings are now at an advanced stage with simple detailing to be incorporated, both parties must go through the visuals closely to deliver the right outcome that matches expectations. During this stage, the drafts are refined several times, revisions to the scene, lighting, materials and layout unit are made, and the desired output is ready. After all, we understand that no one knows the vision for the project better than you, and we do everything we can to do justice to it.
Phase 5: The Final Rendering and Post Production Stage
This is the final stage of the process and includes bringing the 3D photorealistic renderings to their outcome by adding in the finer details through post-production.
After receiving the client’s approval on the last set of draft renderings, we will process the images in high definition; they very often ask us for a specific resolution according to their needs. We are always open to accommodating requests that go beyond our standard deliverables.
Once the renderings are completed and nicely “baked, ” we initialize the post-production process. Using software like Adobe Photoshop and after effects, we will start balancing the colour contrast, brightness, depth and lighting using our secret technics to create a realistic look and get the images ready for delivery and use.
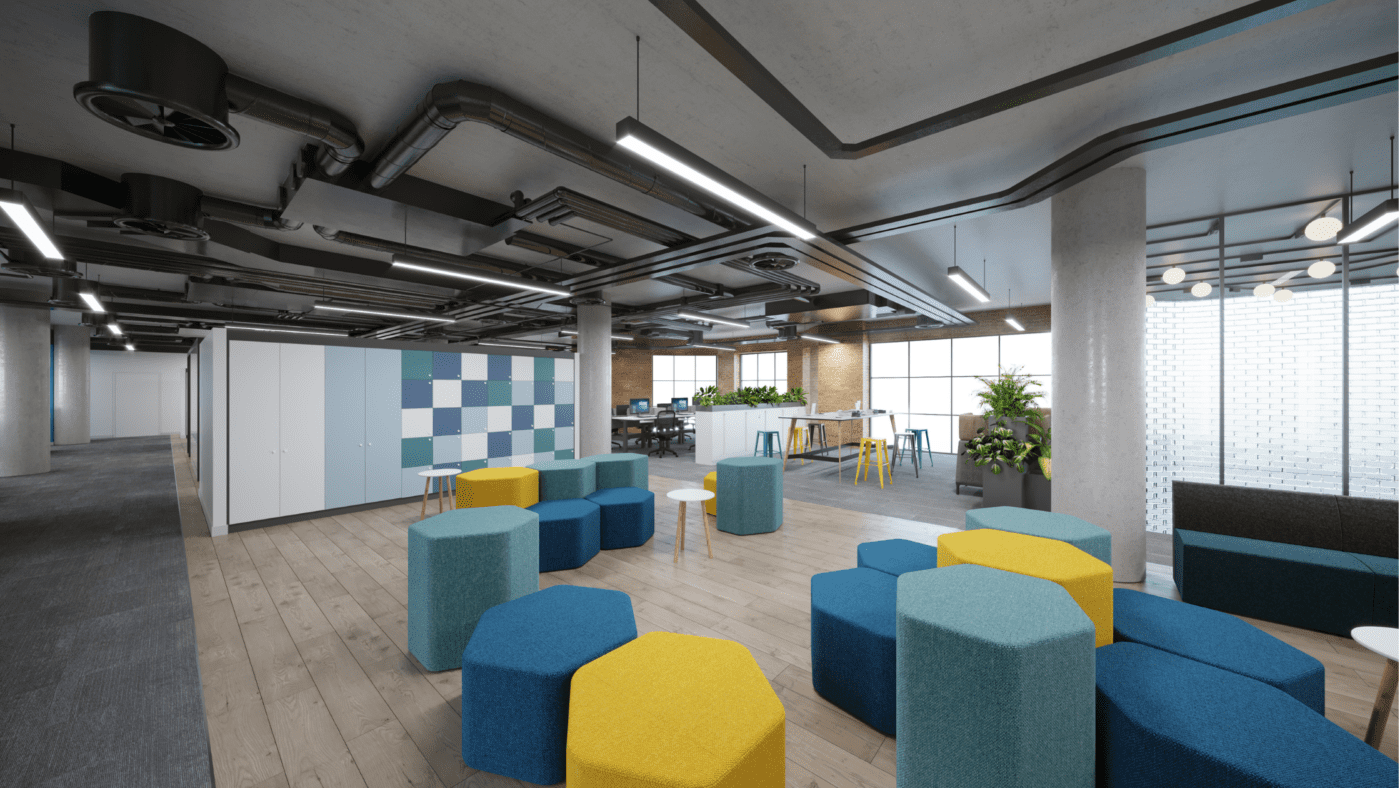
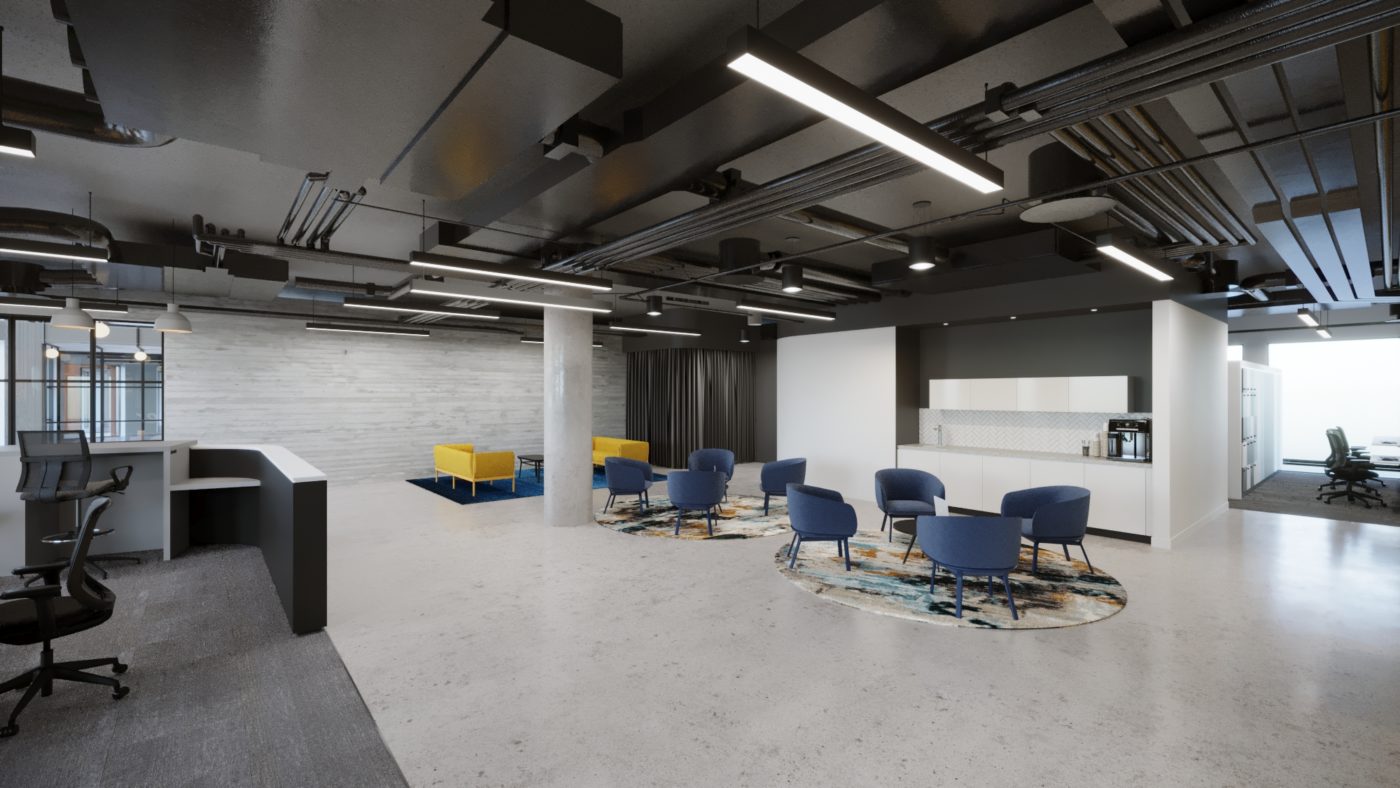
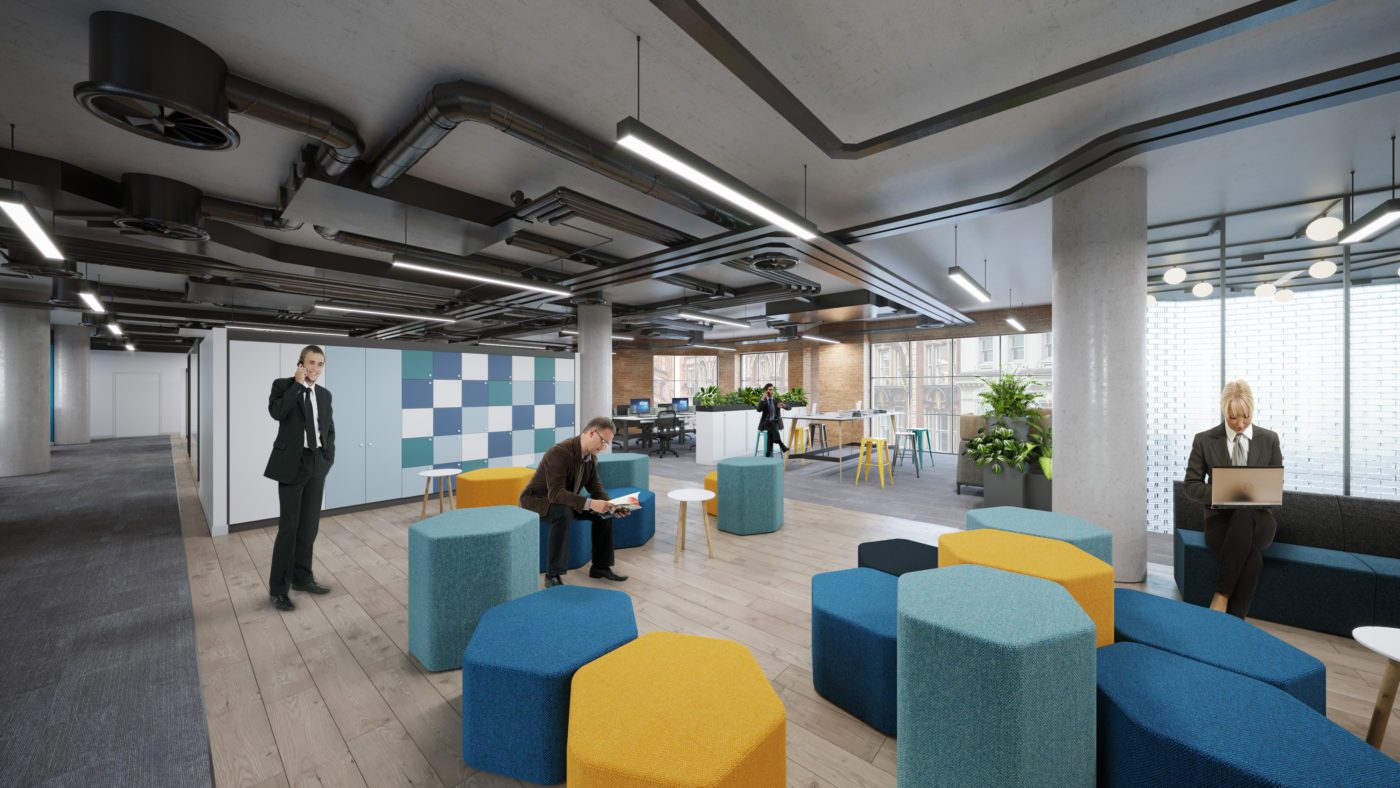
To make the 3D architectural renderings more lifelike, details like people, indoor plants, and landscape views from windows or balconies are added. This helps clients and customers visualize what the office space would look like once occupied.
Once the client is pleased, the high-quality 4K (or more) renders are shared, which can be printed or presented on any screen by our clients.
Developing 3D renderings for your office design helps you and your potential client see the plan come to life. Investing in 3D architectural and interior renderings help not just plan out the look and feel of the space, but also guide the actual building and decorating process, instead of making corrections and adjustments later which would turn out expensive for your client.
The visual appeal as well as the practicality of developing 3D renderings make them a great marketing tool. Not only can you use these for pitching to current clients, but also, the high quality renderings can be used for your portfolio to be showcased for future pitches which not only saves time but also convert prospects quickly.
Are you looking for a boutique 3D rendering studio to partner with? Backed by an expert team of architects and 3D artists, Render Atelier can help bring life to your architectural plans. We can help you take your designs to the next level with stunning and hyper-realistic 3D renders. Have a look at our portfolio to better understand the impeccable quality of our work and the kind of services we provide.
Send us an email at info@renderatelier.com or fill this form to get started.